

Key Takeaways
- Thorough surface prep - not the paint itself - determines whether a spot repair lasts.
- Feathering the patch edges is the key technique for blending into existing painted trim.
- Moisture and wood rot beneath peeling areas must be addressed before any paint is applied.
- Spot repairs work best when the existing paint is in otherwise good condition.
- Primer selection matters: use a primer matched to the trim substrate and paint type.
What you will need
Why Exterior Trim Paint Peels - and What It Tells You
Peeling paint on exterior trim is rarely just a cosmetic issue. It usually signals one of three underlying conditions: moisture infiltrating the wood from outside or behind the trim, a previous paint job applied over inadequately prepared or damp surfaces, or incompatible paint layers where a newer coat isn't adhering to an older one. Identifying which condition you're dealing with helps you fix the right problem - not just the visible one.
Look at where the peeling originates. Paint lifting from the bottom edge of trim or around window sills often traces back to water running behind or under the board. Paint peeling in large sheets suggests a bonding failure between coats. Small bubbles that pop to reveal bare wood typically indicate moisture pushing outward from inside the wall cavity. If your trim sits near older stucco, understanding how the surrounding wall system is built can clarify where water is getting in - the stucco repair overview covers the layered nature of those assemblies.
Spot repairs work well when the damage is localized and the surrounding paint is still sound. If you're seeing widespread peeling across most of the trim, a full repaint may be more efficient - but for typical patches of a few inches to a few feet, the step-by-step process below will get you a clean, lasting result.
What you will need
Tools and Materials You'll Need
Gather everything before you start - having to stop mid-prep for a supply run often means sanding dust or scraped debris gets into surfaces you've already cleaned. The list below covers a standard trim patch repair.
Paint scraper / 5-in-1 tool
Removes loose and peeling paint from the trim surface without gouging the wood.
Sandpaper (80- and 120-grit)
Smooths rough edges and feathers the boundary between old paint and bare wood for a seamless blend.
Exterior wood filler
Fills any surface voids, cracks, or divots left after removing damaged paint and wood.
Exterior spot primer
Seals bare wood and ensures the finish coat adheres properly without flashing.
2-inch angled brush
Gives you controlled application along trim edges and into corners.
For color matching, bring a paint chip from an inconspicuous area of your trim to a paint counter. They can often scan and mix a close match. Keep in mind that older exterior paint weathers and fades, so an exact formula match may still look slightly different in bright light - feathering your edges well minimizes this.
Step-by-Step Repair Instructions
Identify the extent of the damage
Walk the trim and probe any bubbling or discolored areas with a scraper or putty knife. If paint lifts easily, mark those sections. Press firmly on any soft spots in the wood itself - softness can signal rot underneath. If you find significant soft or spongy wood, address that first before painting. The guide on exterior wood rot repairs explains why painting over compromised wood causes repairs to fail quickly.
Scrape all loose and peeling paint
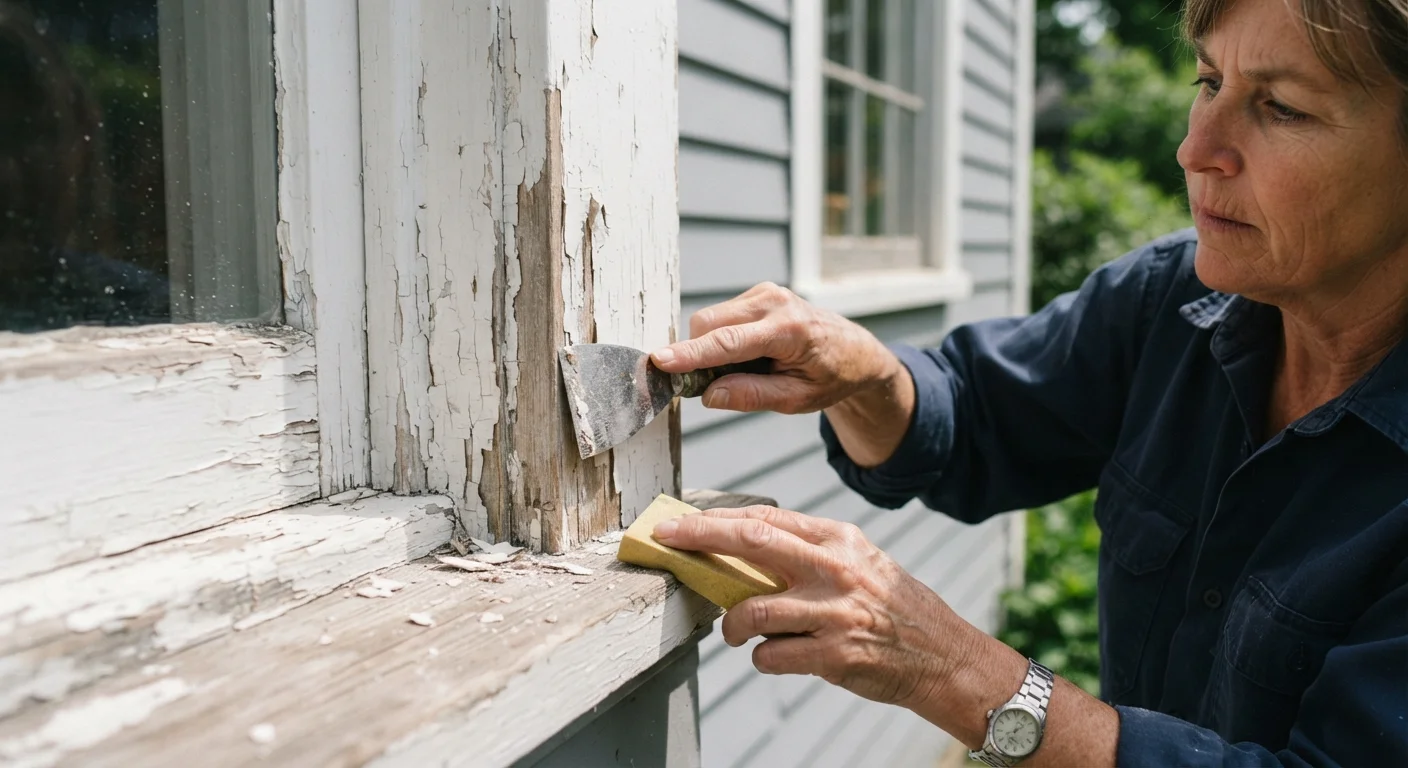
Use a paint scraper to remove every piece of loose paint in the affected area. Work outward from the center of the peel until you reach paint that is firmly bonded to the surface. Don't skip the edges - any paint that lifts even slightly under pressure will cause the new coat to peel prematurely. Collect scraping debris on a drop cloth.
Sand and feather the edges
This step is the difference between a patch that's visible and one that blends in. Use 80-grit sandpaper to smooth the sharp edges where paint meets bare wood, then follow with 120-grit to refine the surface. The goal is a gradual, tapered transition - called feathering - so there's no hard ridge for the new paint to bridge. Sand lightly beyond the scraped area into the surrounding intact paint to widen the blend zone.
Clean the surface thoroughly
Wipe down the sanded area with a damp rag and a small amount of mild detergent, then rinse with clean water and let it dry fully. Dust, oils, and chalky residue from old paint all interfere with adhesion. Do not rush this step - applying primer over a damp surface traps moisture and can cause the same peeling you just fixed.
Fill voids and let dry
If scraping revealed small cracks, nail holes, or shallow divots, fill them with an exterior-rated wood filler. Apply with a putty knife, overfill slightly, and once cured, sand flush with 120-grit paper. Exterior fillers are formulated to flex with seasonal wood movement - interior spackle is not a reliable substitute on outdoor trim.
Apply exterior spot primer
Prime the bare wood and filled areas with an exterior primer compatible with your finish coat (oil-based over oil, latex over latex unless the primer label specifically says otherwise). Use your angled brush to work primer into the feathered edges. Apply a thin, even coat and allow it to dry fully per the manufacturer's instructions. Priming is non-negotiable - bare wood absorbs paint unevenly and creates a visible dull patch called flashing.
Apply finish coats and blend edges
Apply your matched exterior paint in thin coats, feathering the brush strokes outward into the surrounding painted trim. Two thin coats almost always produce a better result than one heavy coat. After the first coat dries, lightly sand with 120-grit to level any brush marks, wipe clean, then apply the second coat. Blend the outer edges by dry-brushing (minimal paint on the brush) into the existing finish. For help matching sheen and color on adjacent painted surfaces, the principles in this guide on painting over water stains address surface consistency well.
Lead Paint Risk in Older Homes
Homes built before 1978 may have layers of lead-based paint on exterior trim. Disturbing this paint through scraping or sanding can release hazardous dust. Use an inexpensive lead test swab to check before starting. If lead is present, follow EPA RRP (Renovation, Repair, and Painting) guidelines or consult a certified lead-safe contractor.
Once both finish coats are dry and cured - typically 24-48 hours depending on temperature and humidity - inspect the repair from several angles and distances. Small sheen differences often even out as the paint fully cures over a few weeks. If the patch remains noticeably lighter or duller, a third thin coat blended well at the edges usually resolves it.
Keeping a small amount of the matched paint sealed and stored gives you an easy touch-up option for future nicks and scrapes - a habit worth building into your regular exterior maintenance. For broader curb appeal improvements beyond trim, see exterior curb appeal upgrades that don't require a full renovation.