

Key Takeaways
- Holes up to about six inches across can typically be patched without replacing an entire drywall panel.
- Joint compound shrinks as it dries - thin coats applied in stages produce a flatter, stronger repair.
- Matching the existing wall texture is the step most homeowners skip, and it's why patches remain visible.
- Proper priming before painting prevents the patched area from showing as a dull spot under certain lighting.
- Holes near electrical boxes or signs of moisture require professional assessment before patching.
What you will need
Understanding the Size of the Job
Not all drywall holes are equal, and the right repair method depends on what you're actually dealing with. Nail holes and small dents - anything roughly the size of a pencil eraser or smaller - can be filled with lightweight spackling compound applied straight from the container. Medium holes, from doorknob strikes or removed anchor bolts, typically measure one to four inches across and call for a self-adhesive mesh patch backed with joint compound. Larger holes up to about six inches may need a backing piece cut from scrap drywall to give the compound something rigid to grip.
Before you patch anything, check whether the damage is purely surface level. If you notice soft or discolored drywall around the hole, that can signal a past moisture problem. Water-damaged drywall should be dried out and the source of moisture addressed before any cosmetic repair begins. Similarly, if a hole is near an electrical outlet or switch, confirm no wires were disturbed - this is a situation where a licensed electrician's eyes are worth the call.
If your walls are older and feel hard and dense rather than soft and papery, they may be plaster rather than drywall. The repair methods differ meaningfully. See our guide on plaster vs. drywall repair to make sure you're using the right approach for your walls.
What you will need
What You'll Need
Gather your materials before you start so the job doesn't stall mid-patch. Having everything within arm's reach also reduces the chance of touching a wet compound surface.
Self-adhesive mesh patch (for holes 1-4 inches)
Provides a rigid backing grid that holds joint compound over medium-sized holes.
Lightweight joint compound (pre-mixed)
The main filling material for building up smooth, level layers over the patch.
6-inch and 10-inch putty knives
Used to apply and feather joint compound in progressively wider passes.
Fine-grit sanding sponge (120-150 grit)
Smooths dried compound between coats without gouging the surface.
Drywall or PVA primer
Seals the porous compound so finish paint absorbs evenly across the repair.
Scrap drywall backer strip (for holes 4-6 inches)
A strip of drywall threaded behind the hole to support the patch from behind.
Texture spray or texture roller
Re-creates the original wall texture over the smooth compound after it dries.
Step-by-Step: Patching the Hole
Work through these steps in order. Rushing the drying time between coats is the most common reason a patch cracks or fails to lay flat.
Prepare the hole edges
Use a putty knife to remove any loose paper facing, crumbled gypsum, or jagged edges around the hole. The perimeter of the hole should be firm and clean. Wipe away dust with a dry cloth. If the hole has a torn paper face extending outward, trim it flush with a utility knife so it doesn't create a ridge under your patch.
Apply the mesh patch or backer
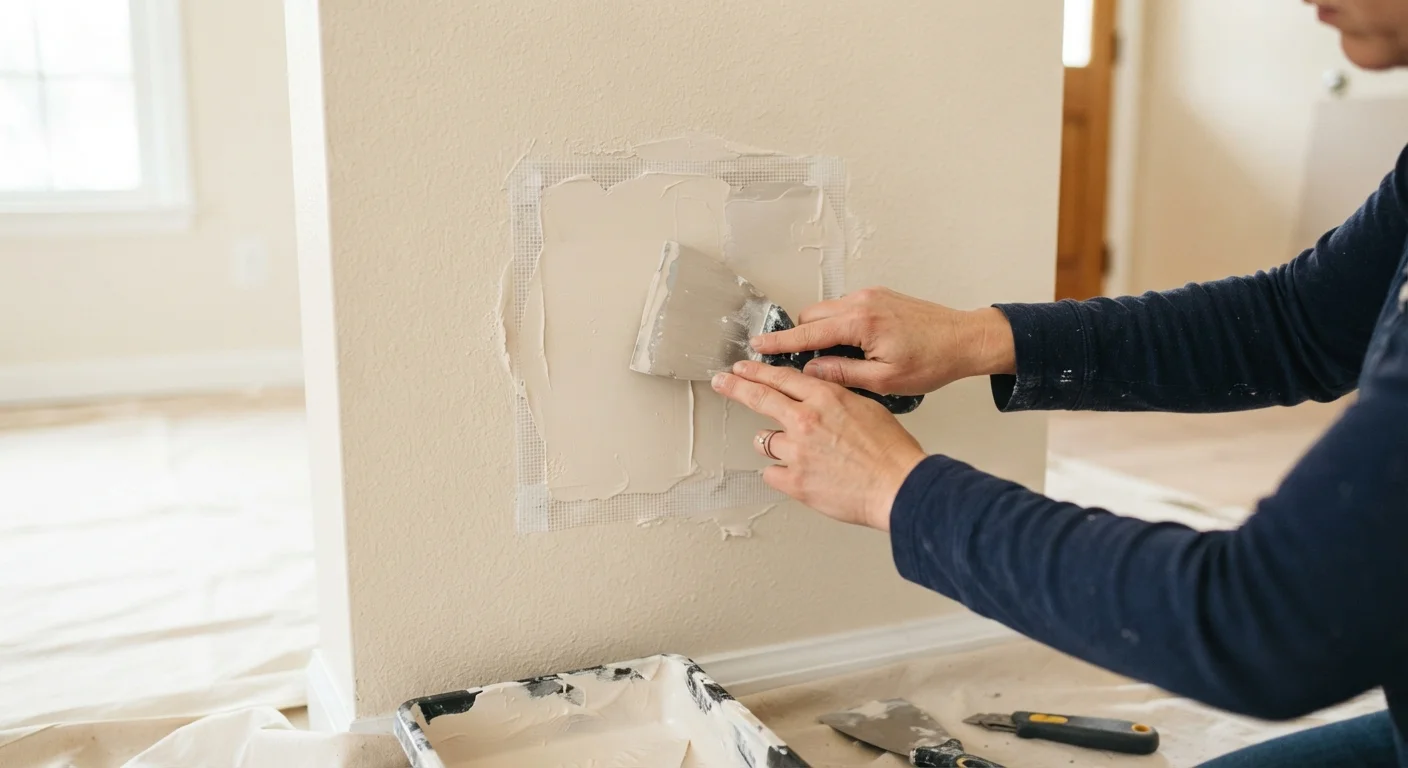
For holes one to four inches: center a self-adhesive mesh patch over the hole and press it firmly to the surrounding wall. For holes four to six inches: cut a strip of scrap drywall slightly longer than the hole's diameter, slide it into the hole, and hold or screw it in place from the front as a backing support. The mesh or backer distributes load so the compound doesn't sink or crack as it dries.
Apply the first coat of joint compound
Load your 6-inch putty knife with a modest amount of pre-mixed joint compound. Spread it across the patch with firm, even strokes, pressing it into the mesh. The goal of the first coat is to fill - not to perfect. It will look lumpy and uneven. That is normal. Feather the edges outward a few inches beyond the patch to begin the gradual transition to the surrounding wall surface.
Let dry completely, then sand lightly
Allow the first coat to dry fully - this typically takes several hours, or overnight in humid conditions. Joint compound changes from gray-beige to a consistent white when fully dry. Do not rush this step. Once dry, use a 120-150 grit sanding sponge to knock down high ridges and smooth the surface. Wipe away dust with a barely damp cloth and let it dry again before proceeding.
Apply second and third coats
Switch to your wider 10-inch putty knife for the second coat. Apply a thinner layer, feathering it several inches beyond the first coat in all directions. Each coat should be thinner and wider than the last. Most repairs need two to three coats to achieve a flush, flat surface. Sand lightly between each coat after it dries fully. By the final coat, the patch area should be nearly indistinguishable in height from the surrounding wall.
Prime and finish
Once the final coat is sanded smooth and dust is removed, apply a coat of drywall or PVA primer to the patched area. Allow it to dry per the manufacturer's directions, then apply your texture if needed and finish paint. Use the existing wall color, and apply paint to blend slightly beyond the patch edges for the most seamless result.
Test Your Texture Match First
Before applying any texture spray or roller technique to your wall, practice on a piece of cardboard or scrap drywall. Spray distance, pressure, and product temperature all affect the pattern. Taking five minutes to test saves you from having to sand down and redo a texture that doesn't match.
Finishing: Texture and Paint
A smooth patch on a textured wall will catch light differently than the surrounding surface - and it will be obvious. Before painting, examine the existing wall texture up close. Common residential textures include orange peel (a fine, bumpy spray pattern), knockdown (irregular flattened peaks), and flat or skip trowel. Each can be approximated at home with the right tools and a little practice on cardboard first.
For orange peel texture, a spray can labeled "orange peel texture" - available at most hardware stores - applied in short bursts from the correct distance can approximate the existing pattern reasonably well. Knockdown texture is typically applied with a roller, then lightly flattened with a broad knife before it fully dries. Matching texture is genuinely a skill that improves with practice, so test your technique on a scrap surface before committing to the wall.
Once texture is dry, prime the patch before applying your finish coat of paint. Joint compound is very porous and will absorb paint unevenly if left unprimed, leaving a dull spot visible under raking light - sometimes called "flashing." A coat of drywall primer or PVA primer seals the surface and gives you a consistent base. For help carrying the finish all the way through, our article on painting over stains without bleed-through covers priming principles that apply here as well.
Don't Skip Priming Before Painting
Joint compound is highly porous and will absorb paint at a different rate than the surrounding wall, leaving the patched area visibly duller under certain lighting conditions - a common issue called flashing. Always prime the repaired area before applying finish paint, even if the patch looks perfectly smooth. Skipping this step is the most frequent cause of a patch that remains noticeable after painting.
When a Patch Isn't the Right Answer
Some wall damage points to something bigger going on. Cracks that run diagonally from window and door corners, stair-step patterns in drywall seams, or cracks that reopen after patching can be signs of foundation movement or structural stress rather than simple surface wear. Patching over these without understanding their cause is a temporary fix at best. Our related article, Drywall Damage: What Each Type of Crack Is Telling You, helps you read the signs before you reach for the compound.
Holes larger than roughly six inches often benefit from a cleaner approach: cut out the damaged section to the nearest studs, install a new piece of drywall, and tape the seams. The result is more durable than a large freestanding patch and easier to texture evenly. If you're uncertain about the scope of the job, a handyperson or drywall contractor can give you a quick assessment - often at low or no cost for a simple evaluation.