

Key Takeaways
- Start with a thorough site assessment before sketching any design ideas.
- Dividing your yard into functional use zones prevents costly layout mistakes.
- A concept plan is a working draft - expect to revise it several times.
- Scale drawings help you avoid furniture and plant overcrowding before installation.
- Permits may be required for hardscaping, irrigation, and lighting work.
Why Process Matters in Landscape Design
Most landscaping regrets share a common root: decisions made too early, without enough information. A patio poured before accounting for drainage. Plants chosen before understanding sunlight patterns. A fire pit placed where it blocks the only view worth having.
Professional landscape designers follow a deliberate sequence - from gathering site data through concept development to a detailed final plan - because each stage informs the next. Homeowners who apply the same discipline, even informally, end up with yards that function well and evolve gracefully over time.
This guide walks through that process step by step, giving you a framework you can use whether you're working solo, collaborating with a designer, or handing plans off to a contractor.
Step 1: Site Assessment
A site assessment is a structured inventory of your yard's physical conditions. Before you can design for a space, you need to understand what it already does - and what it resists.
What to Document
- Sun and shade patterns: Track sunlight at multiple times of day across seasons if possible. South-facing slopes get more sun; north-facing areas stay shaded. This drives plant selection and patio orientation.
- Drainage and slope: Note where water pools after rain and where it runs. Grading problems discovered after installation are expensive to fix.
- Soil type: Sandy soil drains fast; clay soil retains water and can become compacted. A basic soil test from a local cooperative extension service provides useful baseline data.
- Existing features: Map trees, shrubs, utility lines, easements, structures, and access points. Underground utilities must be located before any digging - call 811 (the national dig-safe line) first.
- Microclimate factors: Prevailing wind direction, reflected heat from walls or pavement, and frost pockets all affect what will grow and what will feel comfortable.
Before committing to any plant selection, observe your yard's sun patterns for at least one full week - morning, midday, and late afternoon. Many plants fail because they were placed in light conditions that don't match their requirements.
Sun exposure is the single most common mismatch between a plant's needs and its planted location, and it's entirely preventable with early observation.
Sketch your concept plan at true scale - even roughly - before falling in love with any specific design. A seating area that looks generous in your imagination often shrinks dramatically when measured against actual square footage.
Scale miscalculation is the leading cause of cramped outdoor spaces, and correcting it at the drawing stage costs nothing.
Photograph each area of your yard at different times of day and in different seasons if time allows. These images become invaluable when reviewing plant choices months later.
Step 2: Defining Goals and Use Zones
With site data in hand, the next step is defining what you actually want the yard to do. This is where household priorities shape the design rather than trends or neighbor comparisons.
List specific activities - outdoor dining, children's play, vegetable growing, pet access, privacy screening, passive sitting - and note roughly how much space each realistically needs. Then map those uses onto your site sketch, grouping compatible activities together and separating conflicting ones. A play zone near a vegetable garden, for instance, invites problems.
This is also when circulation - the paths people naturally take through a space - gets considered. Traffic patterns from the house to the garage, from a back door to a detached shed, from a seating area to a grill, all deserve deliberate paths rather than afterthought stepping stones.
For households planning to entertain outdoors, spatial principles for outdoor entertaining layouts are worth reviewing at this stage, since furniture zones and sightlines are easier to plan before hardscaping is committed.
Capture Your Priorities in Writing First
Before drawing anything, write a brief paragraph describing how you want your outdoor space to feel and function in a typical week. This simple exercise prevents scope creep and keeps the design grounded in actual household habits rather than aspirational ones.
Step 3: Developing the Concept Plan
A concept plan - sometimes called a bubble diagram - translates your use zones into rough spatial relationships on paper. It doesn't need to be precise; it needs to be honest about scale and proximity.
Sketch your property boundary to scale on graph paper (a common scale is 1 inch = 10 feet for residential lots). Block out each use zone as a rough shape, then draw approximate flow lines between them. Ask whether the arrangement makes intuitive sense: Can someone carry dishes from the kitchen door to the dining area without obstacles? Does the seating area face an attractive view?
At this stage, consider utility infrastructure. If irrigation will be part of the plan, understanding how irrigation zones and controllers work helps you anticipate where heads, valves, and controllers need to go before hardscaping locks in their locations.
3-4 iterations
Typical concept plan revisions before finalization
Landscape architects commonly report that residential concept plans go through multiple rounds of revision before a client approves the direction.
811
National dig-safe call number (US)
The FCC-designated 811 number connects homeowners to their state's utility notification system before any digging project begins.
Expect to produce multiple concept iterations. Revising on paper costs nothing; revising after installation costs significantly more.
Step 4: Refining Into a Final Plan
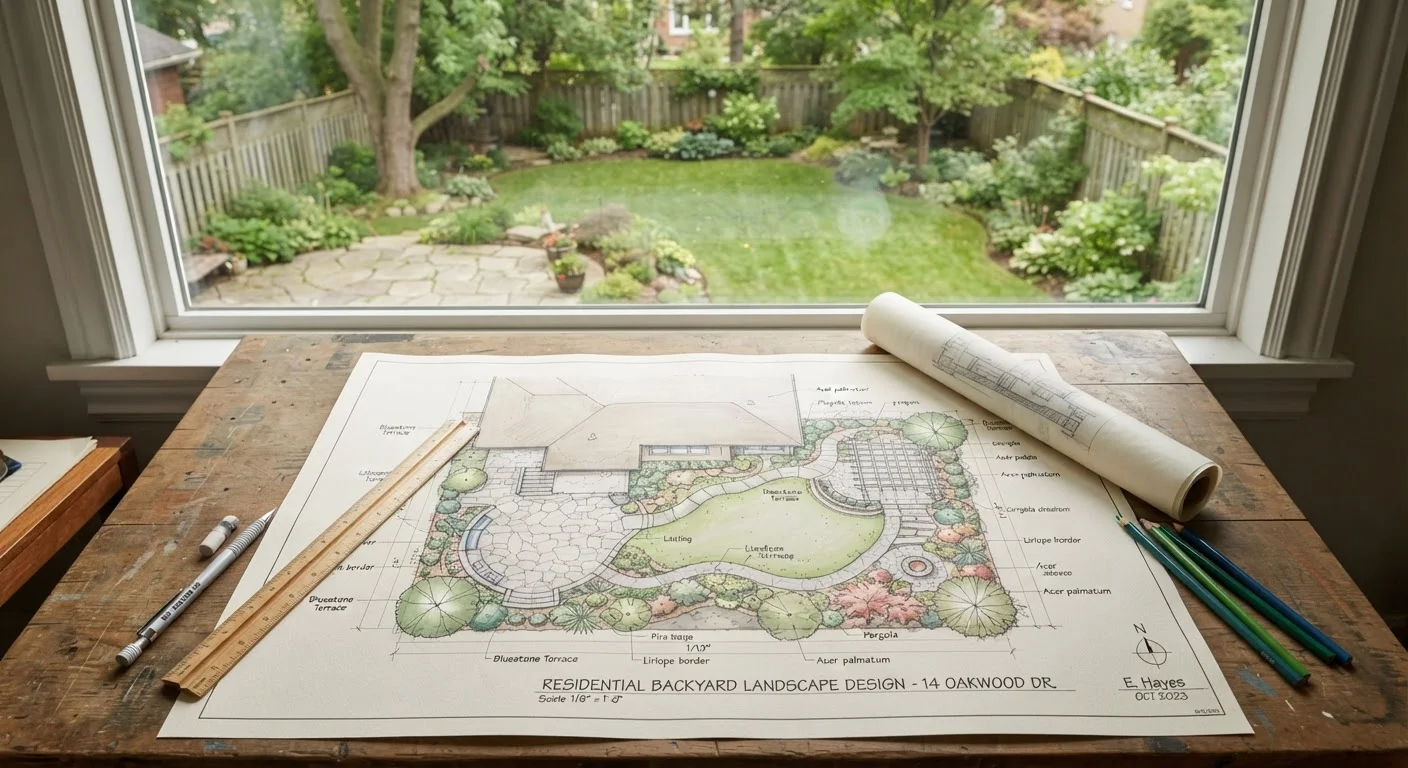
The final plan converts your approved concept into a document detailed enough to build from. For a DIY project, this might be a careful hand drawing or a simple digital plan. For contractor bids, more precision is expected.
Elements of a Complete Final Plan
- Hardscape layout: Exact dimensions and materials for patios, walkways, retaining walls, and edging.
- Planting plan: Species names, mature sizes, spacing, and quantities. Knowing a shrub's mature spread prevents the common mistake of planting too densely.
- Grading and drainage notes: Slope direction and any drainage structures like French drains or dry creek beds.
- Lighting and irrigation rough locations: Even approximate placement guides trenching and wiring runs.
If a contractor produces drawings for you, understanding landscape plan symbols and notation helps you verify that what's on paper matches your intentions before work begins.
Permits Are Often Required for Hardscaping
Patios, retaining walls, fences, and outdoor structures frequently require building permits in US municipalities. Installing without a required permit can complicate home sales and insurance claims down the road. Always check with your local building or planning department before breaking ground on major hardscape features.
A final plan should also account for seasonal maintenance. Year-round outdoor space preparation is a practical companion resource as you consider what the completed yard will require to stay healthy across all four seasons.
When to Bring In a Professional
The design process described here is fully applicable to homeowners working independently on straightforward projects. However, certain conditions warrant professional involvement.
- Significant grading or drainage work may require engineering review and permits in many jurisdictions.
- Retaining walls above a certain height (commonly 3-4 feet, depending on local code) typically require a permit and sometimes a structural engineer.
- Irrigation systems tying into household water supply may need licensed plumber involvement depending on local rules.
- Outdoor electrical work - including low-voltage landscape lighting connected to household circuits - should be handled by a licensed electrician.
When hiring a landscape designer or architect, verify credentials through your state's licensing board where applicable. Ask to see completed project photos, request references, and confirm that any contractor pulling permits is properly licensed and insured in your state.
Local Codes Vary Significantly
Zoning ordinances, setback requirements, and fence height limits differ by municipality and even by neighborhood within the same city. A design that works in one suburb may not be permissible a few miles away. Contact your local planning department early in the process to avoid designing features you cannot legally build.
Even if you complete the design yourself, a one-time consultation with a licensed landscape architect can flag site issues or code considerations you may have missed - often well worth the cost before major installation begins.