

Key Takeaways
- Flashing failures - not damaged shingles - account for the majority of roof-related interior water leaks.
- The most vulnerable flashing locations are chimney bases, skylights, roof valleys, and where a roof meets a vertical wall.
- Flashing can corrode, separate, or crack over time, and these problems are often visible before a leak appears indoors.
- Homeowners can safely inspect flashing from the ground or attic; actual repairs should involve a licensed roofing contractor.
- Fixing flashing early is far less costly than repairing the water damage it causes if left unaddressed.
Roof Flashing
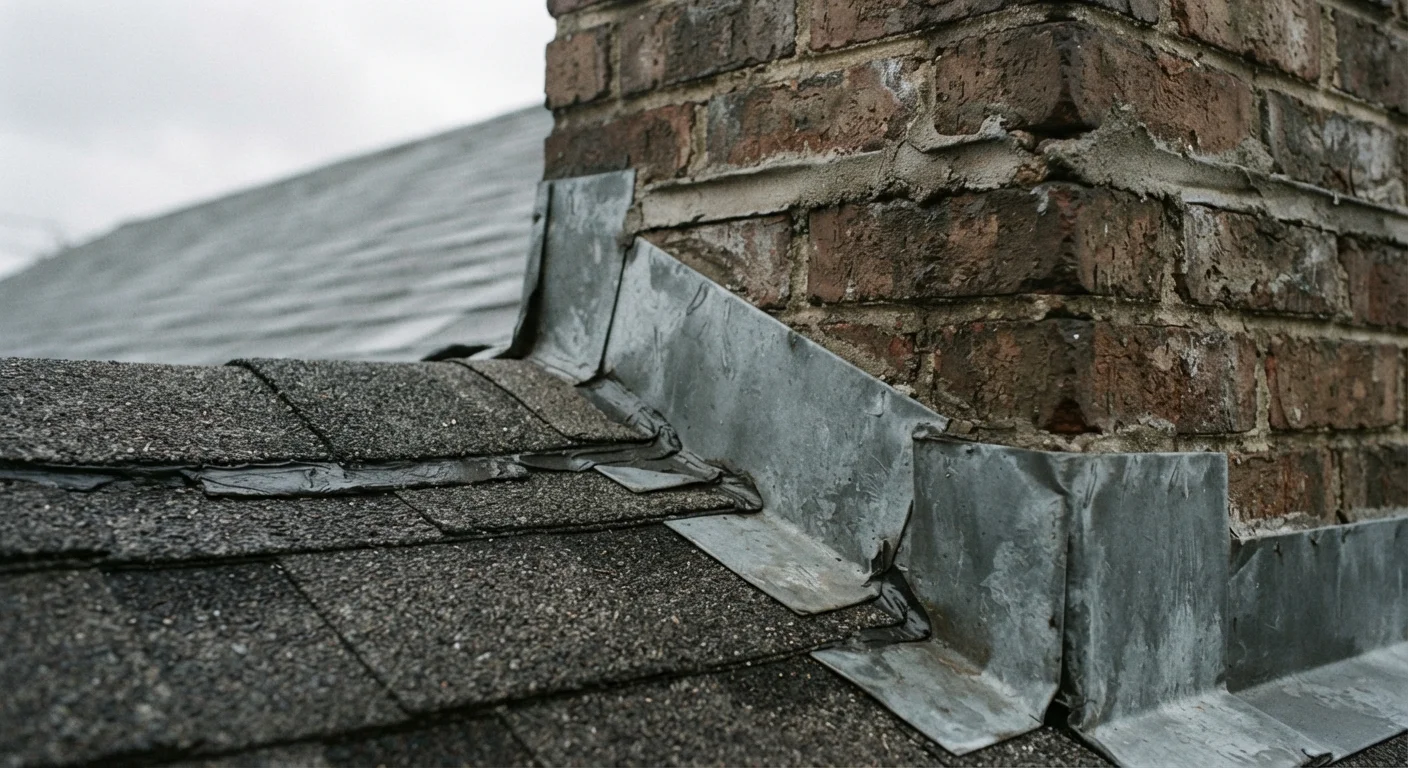
Roof flashing is thin metal sheeting - typically aluminum, galvanized steel, or copper - installed at the joints and transitions on a roof where water is most likely to infiltrate. It bridges the gap between roofing materials and other surfaces like chimneys, skylights, dormers, and walls. Without properly installed flashing, those joints become open pathways for water to reach your home's interior.
Flashing works through a combination of mechanical overlap and, in some installations, sealant. The metal is shaped to direct water away from vulnerable junctions and shed it back onto the shingle surface below.
Why Flashing Is Responsible for So Many Leaks
When homeowners picture a roof leak, they usually imagine a cracked or missing shingle. In practice, the joint points - where two different surfaces meet - are where water most often finds its way in. Shingles cover flat, continuous surfaces reasonably well. Flashing handles the transitions, and transitions are inherently more complex.
Every chimney, skylight, roof valley, vent pipe, and wall junction on your roof represents an interruption in the shingle field. Water flowing down a roof doesn't stop at these intersections - it probes them. Properly installed, overlapping flashing channels water back onto the shingle surface and down off the roof. When flashing fails, that water finds its way under materials and into your home's structure.
95%
Roof leaks attributed to flashing failures
Industry roofing professionals widely cite flashing as the source of the vast majority of roof-related leaks, with shingle failure being comparatively rare.
10-15 yrs
Typical lifespan of flashing sealants
Even when the metal flashing itself remains intact, the sealant used at flashing joints commonly degrades within 10 to 15 years, creating openings for water intrusion.
The frustrating reality is that interior water damage from flashing failure rarely appears directly above the entry point. Water can travel along rafters or roof sheathing for several feet before dripping - making the visible stain on a ceiling a poor indicator of where the real problem is located.
The Most Common Flashing Failure Points
Understanding where flashing is installed helps you know where to look during an inspection. Each of these locations carries a distinct failure profile:
- Chimney flashing: Chimneys require base flashing around the perimeter and counter-flashing embedded into the mortar joints. Over time, mortar cracks, counter-flashing works loose, and the junction opens to water. This is one of the most frequently repaired flashing issues on older homes.
- Skylight flashing: Factory-installed skylight kits include integrated flashing, but the seals around older or improperly installed units deteriorate. Any gap between the skylight curb and the surrounding shingles is a water entry point.
- Roof valleys: Valleys - where two roof planes meet - carry large volumes of runoff. Open metal valley flashing must remain clear and properly lapped. Debris accumulation, corrosion, or insufficient overlap all accelerate failure.
- Roof-to-wall transitions: Where a roof meets a vertical exterior wall (common on dormers and additions), step flashing interlocks with each shingle course. If even one piece slips or corrodes, the entire run becomes vulnerable.
- Pipe and vent boot flashing: Rubber gaskets around vent pipes crack with UV exposure. This is one of the easier failures to spot from the ground - the boot will look brittle, cracked, or pulling away from the pipe.
Other early warning signs of roof trouble often accompany flashing issues and can help you catch problems before interior damage occurs.
What Homeowners Can Safely Inspect
You don't need to climb onto the roof to gather useful information. Two vantage points - the ground and your attic - provide enough visibility to identify likely flashing problems before calling a professional.
From the Ground
Use binoculars on a dry, bright day and scan each flashing location methodically. Look for lifted metal edges, visible rust streaks on shingles below a chimney or skylight, cracked rubber around vent boots, or gaps where flashing meets masonry. These are all signs worth flagging for a professional review.
From the Attic
On a sunny day, enter your attic and let your eyes adjust. Look for pinpoints of light around chimney or vent penetrations - light means gaps that water can also use. After a heavy rain, check for active drips, water staining on rafters, or dark discoloration on the underside of the sheathing. Staining that runs horizontally along a rafter can reveal how far water has traveled from its entry point.
Photograph What You Find in the Attic
Before calling a contractor, take photos of any staining, drips, or light gaps you observe in the attic. Include a reference point in each photo - like a rafter or vent pipe - so the location is clear. This documentation helps the roofer identify the problem area faster and gives you a baseline for verifying the repair was effective.
If you discover evidence of water intrusion in the attic, note its location carefully relative to the roof features above it. This information helps a roofing contractor narrow down the source efficiently. Keep in mind that moisture that reaches wood framing can cause structural rot if the source isn't resolved promptly.
When to Call a Professional - and What to Expect
Flashing repairs are not a straightforward DIY task for most homeowners. Proper re-flashing often requires removing and reinstalling shingles, embedding counter-flashing into masonry, and working at heights. Any of these steps, done incorrectly, can create new leak pathways or void roofing warranties. For work involving electrical components near a roofline or gas flues through a roof, a licensed professional is essential.
When you contact a roofing contractor, ask them to inspect all flashing locations - not just the one you suspect. A thorough visual assessment of the full roof gives you a clearer picture of what needs immediate attention versus what can be monitored. Request a written summary of findings before any work is authorized.
It's also worth noting that cold weather affects roofing repairs in meaningful ways - scheduling inspections and repairs during moderate temperatures generally produces more reliable results. And if you've been putting off other home improvements, addressing the roof first is sound logic: interior upgrades made before resolving roof integrity issues risk being undone by subsequent water damage.